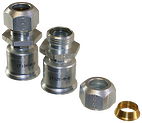
Hose assembly repair using Parker Ferrul-Fix 43-series fitting
|
|
The Ferrul-Fix provides a great option for repairing a hose assembly instead of replacing it. This comes in handy when the replacement hose fittings are not readily available. Examples of applications where hose repair would be a good alternative to replacement include automotive hose assemblies such as power steering hoses, transmission hoses or AC hoses. Ask for P/N 11143 (standard tubing) or 1D043 (metric tubing) and provide the hose and tube size. |
Requirements for Using the Ferrul-Fix:
- The fitting must have a long enough straight tube section for the Ferrul-Fix to attach itself to (about 1” minimum).
- The Ferrul-Fix must be used with a hose compatible with 43-series fittings.
Installation Instructions:

- Cut the formed tube off squarely next to the permanent hose fitting. Lightly deburr the end of the tube internally and externally.
- Disassemble the Ferrul-Fix fitting and lubricate the threads and both ends of the ferrule with Parker Ferulube.
- Slide the nut and ferrule onto the tubing, with the long, straight end of the ferrule pointing toward the tube end.
- Insert the tube end into the Ferrul-Fix body until it bottoms against the shoulder. Slide the ferrule inside the body, and screw the nut down finger tight.
- Wrench the nut down 1 3/4 turns to preset the ferrule.
- Disconnect teh nut and inspect the leading edge of the ferrule to make certain that the biting edge has turned up a shoulder to a height of at least 50% of the ferrule and completely around the tube.
- Assemble the Ferrul-Fix fitting to the hose. Refer to assembly instructions listed in the 43-series Fittings section. Do not assemble to hose before steps 1-6.
- Reassemble tubing into the Ferrul-Fix end, and turn the nut down easily until a sudden increase in force is evident. Turn the bent tube to proper the position if required. Using two wrenches, one on the fitting nipple hex and the other on the nut, tighten an additional 1/6 turn (one wrench flat).


