Assembly Instructions for Parker EO-3 Metric Flareless Tube Fittings
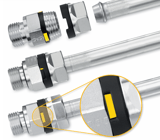 |
Assembly of EO-3 tube fittings is complete when the marking on the indicator rings of the stud and nut align. Indicator rings save the last assembly position on the nut and the marking will indicate proper assembly. If the assembly of EO-3 tube and swivel connections is greater than required, the indicator ring is dragged along on the nut. Re-assembly of EO-3 tube and swivel connections are made using the same instructions as initial installation - assembly is correct when the marking on the indicator rings align. |
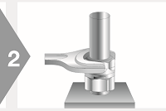
EO-3 Tube Connection Assembly Instructions
 |
 |
 |
 |
|
|
Assembly check:
|
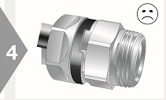
If positioning of the indication ring marks do not align:
|
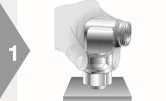
EO-3 Swivel Nut Fittings Assembly Instructions
If positioning of the indication ring marks do not align:
- Further tightening is required until the marks of the indication rings of stud and nut align
 |
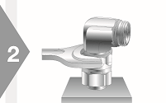 |
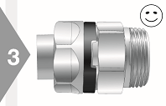 |
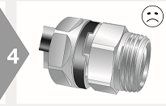 |
|
|
Assembly check:
|
If positioning of the indication ring marks do not align:
|
EO-3 Metric Straight Port Connection Assembly Instructions
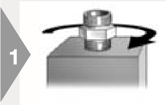 |
 |
||
|
|
|
|
Assembly Torques for EO-3 Fittings in Steel Ports
| Tube O.D. | Male Stud End Metric | Assembly Torque [Nm] | Male Stud End BSPP | Assembly Torque [Nm] |
| 6 | M 10x1 | 18 | G 1/8 A | 18 |
| 8 | M 12x1.5 | 25 | G 1/4 A | 35 |
| 10 | M 14x1.5 | 45 | G 1/4 A | 35 |
| 12 | M 16x1.5 | 55 | G 3/8 A | 70 |
| 15 | M 18x1.5 | 70 | G 1/2 A | 90 |
| 16 | M 22x1.5 | 120 | G 1/2 A | 90 |
| 18 | M 22x1.5 | 120 | G 1/2 A | 90 |
| 20 | M 27x2 | 180 | G 3/4 A | 180 |
| 22 | M 27x2 | 180 | G 3/4 A | 180 |
| 25 | M 33x2 | 310 | G 1 A | 310 |
| 28 | M 33x2 | 310 | G 1 A | 310 |
| 30 | M 42x2 | 450 | G 1 1/4 A | 450 |
| 35 | M 42x2 | 450 | G 1 1/4 A | 450 |
| 38 | M 48x2 | 540 | G 1 1/2 A | 540 |
| 42 | M 48x2 | 540 | G 1 1/2 A | 540 |
Assembly Torques for EO-3 Fittings in Ports Made of Material Other Than Steel
Assembly in ports made of materials that strongly differ in strength and friction from steel generally require modified torques. When the turning angle from fingertight to the recommended torque is more than 30°, a reduction of torque is required. See the chart below for recommended torque reductions:
| Port Material | Hardness | Torque Reduction |
| Steel with use of high performance lubrication | All | 10% |
| Ductile cast iron (e.g. GGG 50) | All | 10% |
| Aluminum | HB 150 | 15% |
| HB 125 | 20% | |
| HB 100 | 30% | |
| < HB 100 | 35% |
How to Order
- Visit One of Our ParkerStores.
- Visit Our eStore.
- Request a Quote.
Related Information
- Thread Guide - Inch Thread
- Thread Guide - Metric, JIS, BSPP
- TS1000 Plating
- Tube End Specs
- Port End Specs
Related Information
- Thread Guide - Inch Thread
- Thread Guide - Metric, JIS, BSPP
- TS1000 Plating
- Tube End Specs
- Port End Specs
